

Here are the top 10 methods for capturing screenshots on Windows 10/11 and Mac:
1. Shortcut: Command+Shift+3
The simplest way to capture a screenshot on macOS laptops/PCs is by pressing Command, Shift, and 3 simultaneously. This command captures an image of the entire screen.
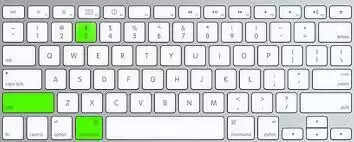
2. Shortcut: Command+Shift+4
For a more advanced command, press Command, Shift, and 4 together. This turns your cursor into a crosshair, enabling you to capture a specific portion of the screen. You can press and release the space bar to turn the crosshair into a camera icon, allowing you to hover over the desired window and click or press enter. Holding the space bar after highlighting an area allows you to lock the shape and size before repositioning it, providing precision in selection. Alternatively, holding the ‘Shift’ key after highlighting an area and before releasing the mouse button locks each side of the selected area, allowing free repositioning of the bottom edge.
3. Shortcut: Command+Shift+5
This option provides a free-hand approach to screenshots. After invoking the Cmd+Shift+5 command, a resizable box appears on the screen. You can adjust it according to your preference and choose to take a screenshot of the selected area by pressing ‘enter’ or selecting the ‘Capture selected portion’ option from the panel below. The panel also includes buttons for capturing the entire screen, capturing a selected window, two video-recording buttons for recording the screen or a selection, and an ‘Option’ button for settings such as choosing the save location and setting a timer. To close the screenshot panel, you can click the ‘X’ button or use the Escape key.
4. Shortcut: Command+Shift+6
Exclusive to MacBook versions with Touch Bar, this option captures a screenshot of the Touch Bar.
5. Snipping Tool on Windows
Windows users can utilize the built-in Snipping Tool by searching for it in the Start menu. This tool allows you to capture screenshots of specific areas, windows, or the entire screen.
6. Print Screen (PrtScn) Key on Windows
Pressing the Print Screen key on Windows captures the entire screen, and using Alt+Print Screen captures only the active window. The captured image can then be pasted into image-editing software.
7. Snip & Sketch on Windows
Windows 10 users can use Snip & Sketch to capture, annotate, and share screenshots. This tool provides additional features for editing and customization.
8. Command+Shift+4, Space Bar on Mac
After pressing Command+Shift+4, you can press the space bar to capture a specific window. The cursor turns into a camera, allowing you to select the window you want to capture.
9. Third-party Screenshot Software
Explore third-party screenshot tools such as Snagit, Lightshot, or Greenshot, which offer additional features and customization options beyond the built-in methods.
10. Windows Snip & Sketch Delayed Capture
Windows Snip & Sketch allows users to set a delay before capturing a screenshot, providing time to set up the desired screen or window. This feature can be accessed through the ‘New’ menu in the Snip & Sketch tool.